So I have this problem.... I can't stand wood, paint, basically any material to sit for very long and not be used. This leads to many an impromptu project. This very thing happened on Saturday.
We had a stack of 1x4's in the garage that were left over from another project. That was way to irresistible to leave alone. So, I decided it was time to redesign our mudroom. It's not really a mudroom, it's just the hallway out to the garage but since that is the door we use most often you would be amazed at the shoes, bags, backpacks, crap that builds up there.
This is a picture of what that area typically looked like. Actually this is better than what it typically looked like because I had the brilliant idea of piling all of before mentioned crap into a laundry basket. Much to my dismay, more crap just built up around it. I tell you, it bothered me every single day. Definitely time to do something about it.
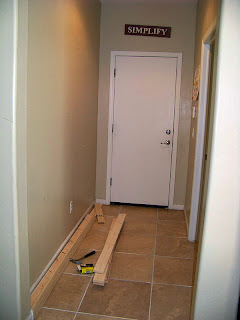
I cleared the space, measured the wall, cut the lumber and was on my way.
I know, this is a terrible picture of me. I have had three kids so I am allowed to have a round rather than a flat stomach, and I did crop most of me out. AAANNNNYYYYWWWAYYYY, this picture is important because if you are doing a project like this alone and don't have anyone to hold the wood for you, tape it to the wall. I hammered the bottom pieces in and then the top but placed a few of the vertical strips along the wall to make sure I was where I needed to be. Then after the top piece is secure, then I could place my vertical pieces exactly where I wanted them to be. Hope that makes sense.
Here it is all secure. One piece of advice I wish I had thought about. I was using scrap wood. Don't do that. Carefully select each piece of wood for the project. Several of these boards were warped which made the job a lot more difficult than it needed to be. If you want to do something like this, make sure the boards are straight by looking down the board or laying it flat on the ground.
Primed and painted white. The paint color is: Delicate white by Olympus.
Noah "helping" me put the hooks on. Bless him!
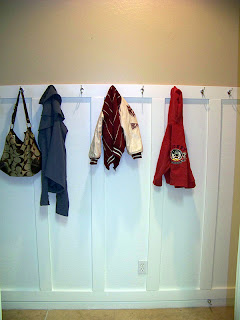
Hooks on!
I now have a usable, functioning space. Hoooorrraaayyy!!!
Shoes got cleaned out, narrowed down and now reside across the hall in the laundry room.
Is it perfect? - Heck no! Who cares? I love it, and it makes me happy every time I come home. If you are unhappy with what you see when you first walk through the door, then change it - go for it! Email me with your before and afters and I will post them.


4 comments:
Becca, I've been wanting to do that in our laundry room, we have to walk through it to get to the garage, and there are always shoes, coats, and backpacks laying all over the floor. I am so sick of backpacks, the shoes I make them put in their closets, and the jackets I make them hang up, but I love this idea, its perfect, I might just get the urge here and do it! Thanks for sharing you amazing woman!
Love what you did! Thinking about how there is a lot of white going on in your house, you should totally paint that shoe shelf white and do the same thing in the laundry room! If I had a laundry room, I would totally do that! Looks fantastic!
I LOVE this! Just a thought...Have you thought about adding another row of hooks at child height so that the kids can hang their own backpacks and coats? Can't wait to hang my own coat there someday!
love love love this! Looks so great! You did a fab and FAB job!!!
Post a Comment